How to Access the Elusive Realm of Verdania in Hollow Knight: Silksong?
Ah, Verdania, the best-kept secret in Hollow Knight: Silksong! It’s so well-hidden that even the National Treasure team would struggle to uncover it. To dive into this elusive area and snag some loot, one must follow a rather elaborate set of instructions, as an IKEA manual seems straightforward by comparison. So buckle up, because this adventure is not for the faint of heart!
Hollow Knight: Silksong is a treasure trove of secret areas, most of which could easily be mistaken for the Bermuda Triangle. For instance, the Will-o’-the-Wisp Grove presents a challenge that makes a Rubik’s Cube look like child’s play. But Verdania, oh boy, that one takes the cake!
How to Actually Get into Verdania?
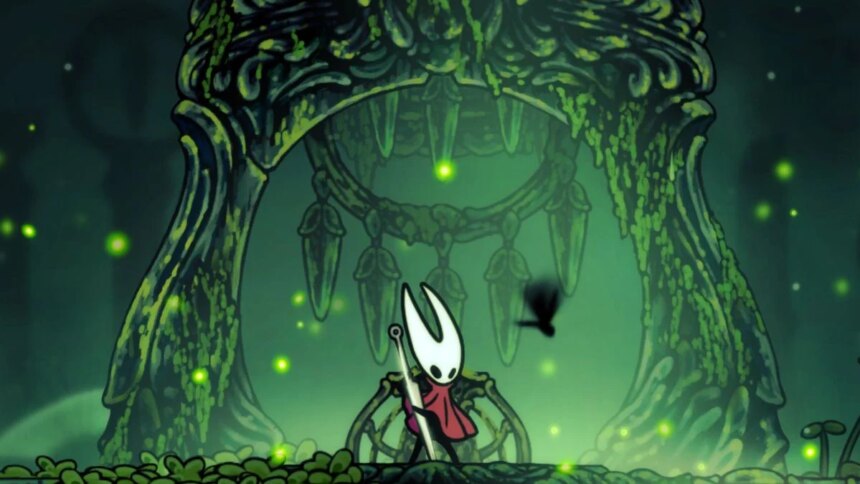
So, how does one step foot in this hidden paradise? Spoiler alert: It’s not easy. One crucial requirement is liberating the Green Prince during either Act 1 or Act 2. It’s anyone’s guess if he has any hope of escaping during Act 3—maybe he just wants to binge-watch another season of a dreadfully dull TV show? For those who missed him, he’s pouting somewhere along the Fisherman’s Path in the land of Sombrevale. You can’t miss him; he’s literally hanging around above an unavoidable passage.
- Need a key? Head to the Bone Abyss vendor and cough up 500 Pearls for a simple Key. Alternatively, enjoy a bit of parkour to reach the second key lounging atop the right tower of the Fisherman’s Path after completing an arena challenge. Here’s a map to guide lost souls:
- Now, about that access to Verdania: it’s hidden behind a series of increasingly absurd requirements. One must wait until Act 3 rolls around—yes, that’s right, the *real* high-level content after a mundane adventure. Plus, Hornet must have explored the Abyss and learned the magical moves of the Elegy of the Depths. You know, just casual stuff.
- With all these boxes ticked off, march over to the far right of Sombrevale until a wall blocks the path after the raven’s nest. Surprise! A tunnel magically appears leading to a new area.
Map of Tréfloria
So now, the Green Prince is wallowing in the next room, sulking over his fallen kingdom and the tragic fate of his companion. But first, before hitting any high notes at his big emotional moment, kindly grab the Map of Tréfloria in the next chamber to the right. This little gem makes traversing the land of sorrow a tad less chaotic. At first glance, this map looks more like a jigsaw puzzle than a navigational tool, but rest assured, things are about to change dramatically.
Entering the Lost Tréfloria
Now, head back to the Green Prince, and it’s time to go all DJ by playing music with Down + Y/Triangle. Sure, he might be mourning his kingdom with tears and angst, but that won’t stop anyone from looting his kingdom and filling up the bestiary with the heartwarming memories of Tréfloria’s illustrious past. Dive into nostalgia, folks!
Walkthrough of Tréfloria
- This memory is not your average stroll in the park; the area is significantly larger than anything previously explored. Objective? Restore the memories of the Green Prince by rummaging through various corners of his once-thriving kingdom. Get ready to encounter special items like breakable totems, activation altars, and even golden eggs to inspect. Oh, and don’t forget about a rather unique boss, the White Stag, just waiting to be put in its place. Activate or smash these items to light up a series of lights that need attention in the correct sequence.
- As a heads-up, there are no benches inside this memory realm, and dying will unceremoniously boot you out. But fret not, the golden orb collection retains all its sweet progress.
Here’s an edited map of Tréfloria marking essential points of interest:
- Beware of the central arena; it only needs to be conquered once. Feel free to unleash everything in the arsenal here.
- The grand altar in the right room requires activating three fountains in the surrounding area before engaging the central button. And yes, play some music afterward!
- In the egg room, charm a few nymphs before seizing golden orbs.
- Various totems need crushing before collecting those golden spheres—some are sneakily hidden behind secret passages, so consider those walls your punching bags. The map isn’t exhaustive on this front.
- Most importantly, track down the White Stag in the upper-left corner of the map. Follow the tufts of white hair like breadcrumbs.
Boss Fights: Meet the White Stag
Now, this boss isn’t just any old encounter; think of it as a divine version of *The Sin* from your favorite drama series.
- Fear not, for defeating it has its secrets. Use the Grapple or magic spells from a safe distance. Bonus: Your tools won’t cost you anything in this memory realm. So unleash those (within reason)!
- Crouching in water can allow one to dodge just about every projectile. A classic strategy is to take a whack at the Stag before seeking refuge in the pond.
Boss Fight: Green Prince & Triflower Duo
Once all memories are restored, head to the visible house adorned with clovers at the top of the central area. The entrance lies above the egg room, setting the stage for a boss showdown against the Green Prince and his sidekick—the Triflower Duo, clearly inspired by the Mechanical Duo.
- Unsurprisingly, the fight mechanics resemble those of the Mechanical Duo, only their combined attacks are considerably more vicious. Timing a jump for the Grapple is crucial; the air dash is just too basic to keep up.
- When the Green Prince or his sidekick shift positions, just dodge the white line. But they’ll unleash a big area attack upon landing, so keep that in mind when planning the escape.
- Only the Green Prince can be attacked during this tussle; if he gets stunned, his buddy temporarily disappears. It’s like a game of hide and seek, but far less fun.
- Don’t forget to utilize every ounce of your power, including combat drones. They’re thankfully returned upon death, so there’s that silver lining!
Joint Heart
Defeating this duo brings with it not just a trophy but also a heart addition for the main quest, alongside a memory for that polished shelf in the Tower. Upon returning to reality, one will find the Green Prince’s lifeless form beside his companion’s. At least he’s finally free from his woes! A revisit to the area might surprise players with the gradual return of Tréfloria’s wildlife. Who knew a little nostalgia could heal, eh?