The Secret of Liberty Falls in Call of Duty Black Ops 6: Here’s How to Unravel This Great Mystery in Zombie Mode
<p class="article__chapo">
    From building the Thrustodyne M23 weapon to confronting the gardener in the graveyard, and tackling the PTL, we explain how to solve the grand secret of Liberty Falls, one of the maps in the zombie mode of Black Ops 6.
</p>
Released on Friday, October 25, 2024, **Call of Duty Black Ops 6** presents a multiplayer mode, a campaign but most importantly, the much-anticipated zombie mode. Many players have already explored the available maps and unlocked the secrets hidden within. Here’s a detailed guide on how to complete the grand secret of Liberty Falls.
<h2 class="article__subtitle" id="everything-starts-at-liberty-falls-church">Everything Starts at the Liberty Falls Church</h2>
<p class="article__paragraph">You cannot begin unraveling the secret without first making your way to the church located at the top of the town. You will need to survive a few rounds to collect Essence and unlock various doors leading up the hill. Once inside the church, interact with the strange machine on your right, and then look up at the podium above the church entrance: Panos will speak to you and provide essential information to progress in this secret.</p>
<div class="w-figure article__widget">
<div class="ui-grid is-gap-8 is-gap-16-tablet">
<div class="is-12 is-12-tablet u-valign-bottom">
<figure class="w-figure__item">
<div class="w-figure__item-container">
<picture>
<source media="(min-width: 37.5rem)" >
<img src="https://static1.millenium.org/articles/5/41/88/85/@/1803097-punch-article_m-1.jpg" alt="Call of Duty: Black Ops 6" width="604" height="339" class="w-figure__img" data-lum-full="https://static1.millenium.org/articles/5/41/88/85/@/1803097-punch-full-1.jpg" data-copyright="" data-lum-mobile="https://static1.millenium.org/articles/5/41/88/85/@/1803097-punch-article_image_bd-1.jpg"></source></picture>
</div>
</figure>
</div>
</div>
</div>
<h2 class="article__subtitle" id="thrustodyne-m23-build-the-miracle-weapon-of-liberty-falls">Thrustodyne M23, Build the Miracle Weapon of Liberty Falls</h2>
<p class="article__paragraph">You may either be lucky with mystery boxes or have to build this essential weapon for the Liberty Falls secret. Be prepared; this process can be time-consuming. Here are the steps to follow:</p>
<ul class="article__ulist">
<li class="article__ulist-item"><span><strong>Find the hydraulic valve</strong>: It’s located at the floral shop "Lily’s Flowerpot" on Washington Avenue.</span></li>
</ul>
<div class="w-figure article__widget">
<div class="ui-grid is-gap-8 is-gap-16-tablet">
<div class="is-12 is-6-tablet u-valign-bottom">
<figure class="w-figure__item">
<div class="w-figure__item-container">
<picture>
<source media="(min-width: 120rem)" >
<source media="(min-width: 64rem)" >
<source media="(min-width: 37.5rem)" >
<img src="https://static1.millenium.org/articles/5/41/88/85/@/1803098-l2-article_m-1.jpg" alt="Call of Duty: Black Ops 6" width="604" height="337" class="w-figure__img" data-lum-full="https://static1.millenium.org/articles/5/41/88/85/@/1803098-l2-full-1.jpg" data-copyright="" data-lum-mobile="https://static1.millenium.org/articles/5/41/88/85/@/1803098-l2-article_image_bd-1.jpg"></source></source></source></picture>
</div>
</figure>
</div>
<div class="is-12 is-6-tablet u-valign-bottom">
<figure class="w-figure__item">
<div class="w-figure__item-container">
<picture>
<source media="(min-width: 120rem)" >
<source media="(min-width: 64rem)" >
<source media="(min-width: 37.5rem)" >
<img src="https://static1.millenium.org/articles/5/41/88/85/@/1803099-lily-article_m-1.jpg" alt="Call of Duty: Black Ops 6" width="604" height="339" class="w-figure__img" data-lum-full="https://static1.millenium.org/articles/5/41/88/85/@/1803099-lily-full-1.jpg" data-copyright="" data-lum-mobile="https://static1.millenium.org/articles/5/41/88/85/@/1803099-lily-article_image_bd-1.jpg"></source></source></source></picture>
</div>
</figure>
</div>
</div>
</div>
<ul class="article__ulist">
<li class="article__ulist-item"><span><strong>Retrieve the pressure gauge</strong>: Place the hydraulic valve on the gauge found on the wall to the right of the bowling alley and then complete a pressure challenge. You need to interact at the valve, building pressure while fending off zombies. The goal here is to quickly build pressure without dying; having a teammate can be incredibly helpful for completing this challenge. Once the gauge hits a high enough reading, it will detach from the pipe, allowing you to collect it to start constructing the Thrustodyne M23.</span></li>
</ul>
<div class="w-figure article__widget">
<div class="ui-grid is-gap-8 is-gap-16-tablet">
<div class="is-12 is-12-tablet u-valign-bottom">
<figure class="w-figure__item">
<div class="w-figure__item-container">
<picture>
<source media="(min-width: 37.5rem)" >
<img src="https://static1.millenium.org/articles/5/41/88/85/@/1803100-b1-article_m-1.jpg" alt="Call of Duty: Black Ops 6" width="604" height="339" class="w-figure__img" data-lum-full="https://static1.millenium.org/articles/5/41/88/85/@/1803100-b1-full-1.jpg" data-copyright="" data-lum-mobile="https://static1.millenium.org/articles/5/41/88/85/@/1803100-b1-article_image_bd-1.jpg"></source></picture>
</div>
</figure>
</div>
</div>
</div>
<ul class="article__ulist">
<li class="article__ulist-item"><span><strong>Trigger the cutscene in the Ether Black church</strong>: Head to the strange machine on the right in the church and let Panos speak.</span></li>
</ul>
<div class="w-figure article__widget">
<div class="ui-grid is-gap-8 is-gap-16-tablet">
<div class="is-12 is-12-tablet u-valign-bottom">
<figure class="w-figure__item">
<div class="w-figure__item-container">
<picture>
<source media="(min-width: 37.5rem)" >
<img src="https://static1.millenium.org/articles/5/41/88/85/@/1803101-r8-article_m-1.jpg" alt="Call of Duty: Black Ops 6" width="604" height="339" class="w-figure__img" data-lum-full="https://static1.millenium.org/articles/5/41/88/85/@/1803101-r8-full-1.jpg" data-copyright="" data-lum-mobile="https://static1.millenium.org/articles/5/41/88/85/@/1803101-r8-article_image_bd-1.jpg"></source></picture>
</div>
</figure>
</div>
</div>
</div>
<ul class="article__ulist">
<li class="article__ulist-item"><span><strong>Eliminate the gardener in the cemetery</strong>: Make your way to the cemetery to take down the Gardener zombie. He only appears in this area, so circle around the church, on the cemetery side, in hopes of encountering him. He should appear after the cutscene, so you shouldn’t have difficulty finding him. However, if he doesn’t show, continue progressing through the rounds to increase your chances of encountering him. Upon his defeat, he will drop keys that you must collect to retrieve the second piece of the Thrustodyne M23.</span></li>
</ul>
<div class="w-figure article__widget">
<div class="ui-grid is-gap-8 is-gap-16-tablet">
<div class="is-12 is-12-tablet u-valign-bottom">
<figure class="w-figure__item">
<div class="w-figure__item-container">
<picture>
<source media="(min-width: 37.5rem)" >
<img src="https://static1.millenium.org/articles/5/41/88/85/@/1803102-z1-article_m-1.jpg" alt="Call of Duty: Black Ops 6" width="604" height="339" class="w-figure__img" data-lum-full="https://static1.millenium.org/articles/5/41/88/85/@/1803102-z1-full-1.jpg" data-copyright="" data-lum-mobile="https://static1.millenium.org/articles/5/41/88/85/@/1803102-z1-article_image_bd-1.jpg"></source></picture>
</div>
</figure>
</div>
</div>
</div>
<ul class="article__ulist">
<li class="article__ulist-item"><span><strong>Retrieve the handbrake</strong>: Head to the back of the cemetery, into the gardener's yard, to find a small shed. Interact with the door, which will open to provide access to the handbrake.</span></li>
</ul>
<div class="w-figure article__widget">
<div class="ui-grid is-gap-8 is-gap-16-tablet">
<div class="is-12 is-6-tablet u-valign-bottom">
<figure class="w-figure__item">
<div class="w-figure__item-container">
<picture>
<source media="(min-width: 120rem)" >
<source media="(min-width: 64rem)" >
<source media="(min-width: 37.5rem)" >
<img src="https://static1.millenium.org/articles/5/41/88/85/@/1803103-j2-article_m-1.jpg" alt="Call of Duty: Black Ops 6" width="604" height="338" class="w-figure__img" data-lum-full="https://static1.millenium.org/articles/5/41/88/85/@/1803103-j2-full-1.jpg" data-copyright="" data-lum-mobile="https://static1.millenium.org/articles/5/41/88/85/@/1803103-j2-article_image_bd-1.jpg"></source></source></source></picture>
</div>
</figure>
</div>
<div class="is-12 is-6-tablet u-valign-bottom">
<figure class="w-figure__item">
<div class="w-figure__item-container">
<picture>
<source media="(min-width: 120rem)" >
<source media="(min-width: 64rem)" >
<source media="(min-width: 37.5rem)" >
<img src="https://static1.millenium.org/articles/5/41/88/85/@/1803104-j1-article_m-1.jpg" alt="Call of Duty: Black Ops 6" width="604" height="338" class="w-figure__img" data-lum-full="https://static1.millenium.org/articles/5/41/88/85/@/1803104-j1-full-1.jpg" data-copyright="" data-lum-mobile="https://static1.millenium.org/articles/5/41/88/85/@/1803104-j1-article_image_bd-1.jpg"></source></source></source></picture>
</div>
</figure>
</div>
</div>
</div>
<ul class="article__ulist">
<li class="article__ulist-item"><span><strong>Wait until round 11 to unlock access to the radio store</strong> (located near the motel, in the parking area): Ensure that the Masher creates a sonic charge on the grill of the Radio House store. This charge will allow you to access the inside of the store.</span></li>
</ul>
<div class="w-figure article__widget">
<div class="ui-grid is-gap-8 is-gap-16-tablet">
<div class="is-12 is-6-tablet u-valign-bottom">
<figure class="w-figure__item">
<div class="w-figure__item-container">
<picture>
<source media="(min-width: 120rem)" >
<source media="(min-width: 64rem)" >
<source media="(min-width: 37.5rem)" >
<img src="https://static1.millenium.org/articles/5/41/88/85/@/1803105-s2-article_m-1.jpg" alt="Call of Duty: Black Ops 6" width="604" height="338" class="w-figure__img" data-lum-full="https://static1.millenium.org/articles/5/41/88/85/@/1803105-s2-full-1.jpg" data-copyright="" data-lum-mobile="https://static1.millenium.org/articles/5/41/88/85/@/1803105-s2-article_image_bd-1.jpg"></source></source></source></picture>
</div>
</figure>
</div>
<div class="is-12 is-6-tablet u-valign-bottom">
<figure class="w-figure__item">
<div class="w-figure__item-container">
<picture>
<source media="(min-width: 120rem)" >
<source media="(min-width: 64rem)" >
<source media="(min-width: 37.5rem)" >
<img src="https://static1.millenium.org/articles/5/41/88/85/@/1803106-s1-article_m-1.jpg" alt="Call of Duty: Black Ops 6" width="604" height="339" class="w-figure__img" data-lum-full="https://static1.millenium.org/articles/5/41/88/85/@/1803106-s1-full-1.jpg" data-copyright="" data-lum-mobile="https://static1.millenium.org/articles/5/41/88/85/@/1803106-s1-article_image_bd-1.jpg"></source></source></source></picture>
</div>
</figure>
</div>
</div>
</div>
<ul class="article__ulist">
<li class="article__ulist-item"><span><strong>Retrieve the electric cables</strong>: At the back of the store, you can interact with debris. Among them, you will find the third and final piece necessary for the Thrustodyne M23, which consists of the electric cables. Now head toward the motel. On the first floor, a new room will open with numerous zombies spilling out. Eliminate them, then enter the room to build the Thrustodyne M23 on the workbench.</span></li>
</ul>
<div class="w-figure article__widget">
<div class="ui-grid is-gap-8 is-gap-16-tablet">
<div class="is-12 is-6-tablet u-valign-bottom">
<figure class="w-figure__item">
<div class="w-figure__item-container">
<picture>
<source media="(min-width: 120rem)" >
<source media="(min-width: 64rem)" >
<source media="(min-width: 37.5rem)" >
<img src="https://static1.millenium.org/articles/5/41/88/85/@/1803107-g2-article_m-1.jpg" alt="Call of Duty: Black Ops 6" width="604" height="338" class="w-figure__img" data-lum-full="https://static1.millenium.org/articles/5/41/88/85/@/1803107-g2-full-1.jpg" data-copyright="" data-lum-mobile="https://static1.millenium.org/articles/5/41/88/85/@/1803107-g2-article_image_bd-1.jpg"></source></source></source></picture>
</div>
</figure>
</div>
<div class="is-12 is-6-tablet u-valign-bottom">
<figure class="w-figure__item">
<div class="w-figure__item-container">
<picture>
<source media="(min-width: 120rem)" >
<source media="(min-width: 64rem)" >
<source media="(min-width: 37.5rem)" >
<img src="https://static1.millenium.org/articles/5/41/88/85/@/1803108-g1-article_m-1.jpg" alt="Call of Duty: Black Ops 6" width="604" height="336" class="w-figure__img" data-lum-full="https://static1.millenium.org/articles/5/41/88/85/@/1803108-g1-full-1.jpg" data-copyright="" data-lum-mobile="https://static1.millenium.org/articles/5/41/88/85/@/1803108-g1-article_image_bd-1.jpg"></source></source></source></picture>
</div>
</figure>
</div>
</div>
</div>
<h2 class="article__subtitle" id="how-to-construct-the-ptl">How to Construct the PTL?</h2>
<p class="article__paragraph">Now that you have the Thrustodyne M23 weapon, things get a bit trickier. To construct the PTL (a powerful generator), you’ll need to find the following components:</p>
<ul class="article__ulist">
<li class="article__ulist-item"><span><strong>Olly’s Comic Book Store</strong>: The first piece can be found on the ceiling, just above the display located in the center of the comic book store.</span></li>
<li class="article__ulist-item"><span><strong>The Ether Black Church</strong>: On the broken railing right next to Panos, you will find the second piece of the PTL.</span></li>
<li class="article__ulist-item"><span><strong>Avenue Washington Building</strong>: By jumping from the roof of Hill Street and landing on a truck, you’ll be able to collect the last piece of the PTL.</span></li>
</ul>
<div class="w-figure article__widget">
<div class="ui-grid is-gap-8 is-gap-16-tablet">
<div class="is-12 is-6-tablet u-valign-bottom">
<figure class="w-figure__item">
<div class="w-figure__item-container">
<picture>
<source media="(min-width: 120rem)" >
<source media="(min-width: 64rem)" >
<source media="(min-width: 37.5rem)" >
<img src="https://static1.millenium.org/articles/5/41/88/85/@/1803137-p2-article_m-1.jpg" alt="Call of Duty: Black Ops 6" width="604" height="339" class="w-figure__img" data-lum-full="https://static1.millenium.org/articles/5/41/88/85/@/1803137-p2-full-1.jpg" data-copyright="" data-lum-mobile="https://static1.millenium.org/articles/5/41/88/85/@/1803137-p2-article_image_bd-1.jpg"></source></source></source></picture>
</div>
</figure>
</div>
<div class="is-12 is-6-tablet u-valign-bottom">
<figure class="w-figure__item">
<div class="w-figure__item-container">
<picture>
<source media="(min-width: 120rem)" >
<source media="(min-width: 64rem)" >
<source media="(min-width: 37.5rem)" >
<img src="https://static1.millenium.org/articles/5/41/88/85/@/1803138-p1-article_m-1.jpg" alt="Call of Duty: Black Ops 6" width="604" height="338" class="w-figure__img" data-lum-full="https://static1.millenium.org/articles/5/41/88/85/@/1803138-p1-full-1.jpg" data-copyright="" data-lum-mobile="https://static1.millenium.org/articles/5/41/88/85/@/1803138-p1-article_image_bd-1.jpg"></source></source></source></picture>
</div>
</figure>
</div>
</div>
</div>
<div class="w-figure article__widget">
<div class="ui-grid is-gap-8 is-gap-16-tablet">
<div class="is-12 is-6-tablet u-valign-bottom">
<figure class="w-figure__item">
<div class="w-figure__item-container">
<picture>
<source media="(min-width: 120rem)" >
<source media="(min-width: 64rem)" >
<source media="(min-width: 37.5rem)" >
<img src="https://static1.millenium.org/articles/5/41/88/85/@/1803139-p4-article_m-1.jpg" alt="Call of Duty: Black Ops 6" width="604" height="338" class="w-figure__img" data-lum-full="https://static1.millenium.org/articles/5/41/88/85/@/1803139-p4-full-1.jpg" data-copyright="" data-lum-mobile="https://static1.millenium.org/articles/5/41/88/85/@/1803139-p4-article_image_bd-1.jpg"></source></source></source></picture>
</div>
</figure>
</div>
<div class="is-12 is-6-tablet u-valign-bottom">
<figure class="w-figure__item">
<div class="w-figure__item-container">
<picture>
<source media="(min-width: 120rem)" >
<source media="(min-width: 64rem)" >
<source media="(min-width: 37.5rem)" >
<img src="https://static1.millenium.org/articles/5/41/88/85/@/1803140-p3-article_m-1.jpg" alt="Call of Duty: Black Ops 6" width="604" height="338" class="w-figure__img" data-lum-full="https://static1.millenium.org/articles/5/41/88/85/@/1803140-p3-full-1.jpg" data-copyright="" data-lum-mobile="https://static1.millenium.org/articles/5/41/88/85/@/1803140-p3-article_image_bd-1.jpg"></source></source></source></picture>
</div>
</figure>
</div>
</div>
</div>
<p class="article__paragraph">With all three components in hand, go to the roof above the truck you used, utilizing the zip line from the cemetery. That is where you will find the workbench needed to craft the portal generator.</p>
<h2 class="article__subtitle" id="how-to-open-the-portal-for-the-priority-target">How to Open the Portal for the Priority Target?</h2>
<p class="article__paragraph">Once you have constructed the PTL, return to the church to retrieve the <strong>ether reservoir</strong> located on the strange machine from the beginning of the secret, then head toward one of the storm clouds present on the map.</p>
<p class="article__paragraph">With the PTL and reservoir in hand, your next task is to place the PTL under one of the storm clouds located at various points on the map, and then lure the priority target toward an <strong>ether trap</strong>.</p>
<p class="article__paragraph">When the target is over the ether trap, you must eliminate them while the trap is active, with the reservoir on your back, making sure to stay near the trap yourself. Be careful; the reservoir significantly reduces your movement speed. After defeating the priority target on the trap, take their soul back to the church to continue the Liberty Falls secret.</p>
<div class="w-figure article__widget">
<div class="ui-grid is-gap-8 is-gap-16-tablet">
<div class="is-12 is-12-tablet u-valign-bottom">
<figure class="w-figure__item">
<div class="w-figure__item-container">
<picture>
<source media="(min-width: 37.5rem)" >
<img src="https://static1.millenium.org/articles/5/41/88/85/@/1803143-v1-article_m-1.jpg" alt="Call of Duty: Black Ops 6" width="604" height="338" class="w-figure__img" data-lum-full="https://static1.millenium.org/articles/5/41/88/85/@/1803143-v1-full-1.jpg" data-copyright="" data-lum-mobile="https://static1.millenium.org/articles/5/41/88/85/@/1803143-v1-article_image_bd-1.jpg"></source></picture>
</div>
</figure>
</div>
</div>
</div>
<h2 class="article__subtitle" id="obtain-the-strauss-counter-and-calibrate-the-cameras">Obtain the Strauss Counter and Calibrate the Cameras</h2>
<p class="article__paragraph">After placing the first ether reservoir at the church, it's time to retrieve the second reservoir. First, grab the Strauss Counter located on the church machine, as it will help you calibrate the cameras that generate a new reservoir.</p>
<div class="w-figure article__widget">
<div class="ui-grid is-gap-8 is-gap-16-tablet">
<div class="is-12 is-12-tablet u-valign-bottom">
<figure class="w-figure__item">
<div class="w-figure__item-container">
<picture>
<source media="(min-width: 37.5rem)" >
<img src="https://static1.millenium.org/articles/5/41/88/85/@/1803145-sr-article_m-1.jpg" alt="Call of Duty: Black Ops 6" width="604" height="337" class="w-figure__img" data-lum-full="https://static1.millenium.org/articles/5/41/88/85/@/1803145-sr-full-1.jpg" data-copyright="" data-lum-mobile="https://static1.millenium.org/articles/5/41/88/85/@/1803145-sr-article_image_bd-1.jpg"></source></picture>
</div>
</figure>
</div>
</div>
</div>
<p class="article__paragraph">Now proceed to the <strong>three white cameras</strong> scattered across the map to calibrate them. You need to use the Strauss Counter in front of each of these cameras. Depending on the color it indicates, adjust the camera accordingly:</p>
<ul class="article__ulist">
<li class="article__ulist-item"><span>If the Strauss Counter shows green, set the camera to red,</span></li>
<li class="article__ulist-item"><span>If the Strauss Counter shows red, set the camera to green,</span></li>
<li class="article__ulist-item"><span>If the Strauss Counter shows orange, set the camera to orange,</span></li>
</ul>
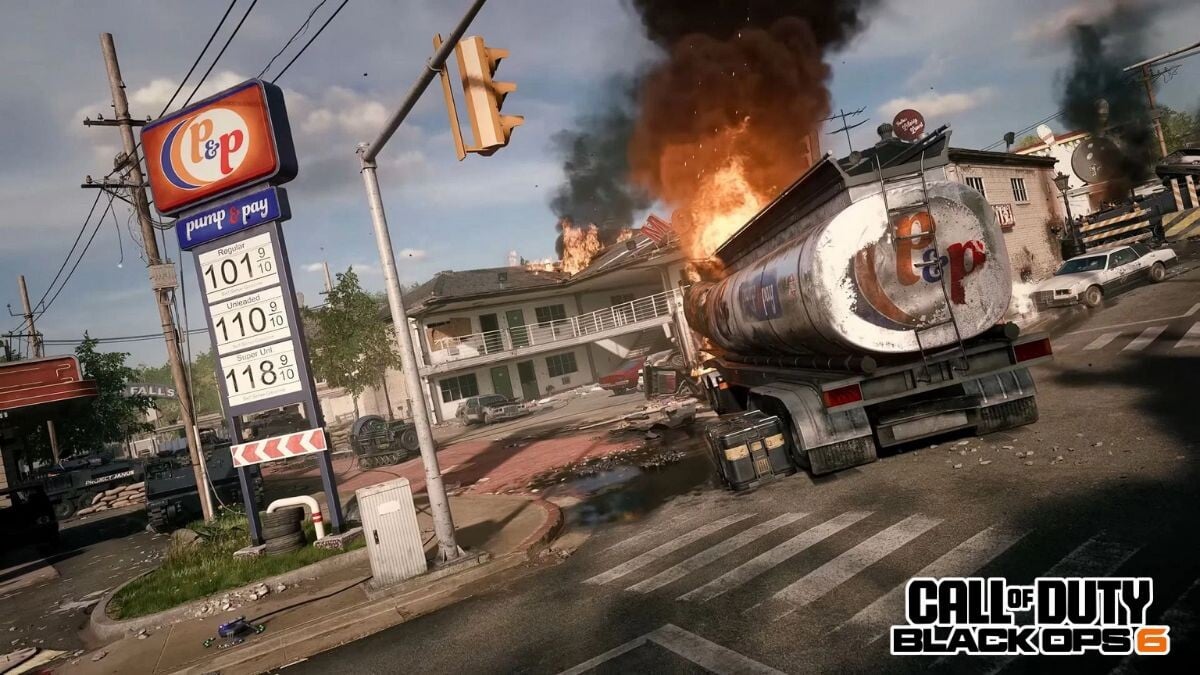
<p class="article__paragraph">Once the cameras activate and rotate, you will be able to identify the location of the second ether reservoir, which is located more specifically at the gas station from the start of the game.</p>
<div class="w-figure article__widget">
<div class="ui-grid is-gap-8 is-gap-16-tablet">
<div class="is-12 is-6-tablet u-valign-bottom">
<figure class="w-figure__item">
<div class="w-figure__item-container">
<picture>
<source media="(min-width: 120rem)" >
<source media="(min-width: 64rem)" >
<source media="(min-width: 37.5rem)" >
<img src="https://static1.millenium.org/articles/5/41/88/85/@/1803146-st1-article_m-1.jpg" alt="Call of Duty: Black Ops 6" width="604" height="338" class="w-figure__img" data-lum-full="https://static1.millenium.org/articles/5/41/88/85/@/1803146-st1-full-1.jpg" data-copyright="" data-lum-mobile="https://static1.millenium.org/articles/5/41/88/85/@/1803146-st1-article_image_bd-1.jpg"></source></source></source></picture>
</div>
</figure>
</div>
<div class="is-12 is-6-tablet u-valign-bottom">
<figure class="w-figure__item">
<div class="w-figure__item-container">
<picture>
<source media="(min-width: 120rem)" >
<source media="(min-width: 64rem)" >
<source media="(min-width: 37.5rem)" >
<img src="https://static1.millenium.org/articles/5/41/88/85/@/1803147-p9-article_m-1.jpg" alt="Call of Duty: Black Ops 6" width="604" height="338" class="w-figure__img" data-lum-full="https://static1.millenium.org/articles/5/41/88/85/@/1803147-p9-full-1.jpg" data-copyright="" data-lum-mobile="https://static1.millenium.org/articles/5/41/88/85/@/1803147-p9-article_image_bd-1.jpg"></source></source></source></picture>
</div>
</figure>
</div>
</div>
</div>
<h2 class="article__subtitle" id="the-end-of-the-secret">The End of the Secret</h2>
<p class="article__paragraph">Now that you have the PTL and the second ether reservoir, you need to perform the same actions as with the first portal: summon the priority target, escort them to the ether trap, eliminate them in the trap while ensuring you are close enough to absorb their soul. After defeating the target, make your way immediately to the church to reach the conclusion of the secret.</p>
<p class="article__paragraph">Once there, you’ll need to survive several waves of zombies and elites inside the church itself. Upon completion, you and your companions will collapse to the ground. The game will ask you whether you wish to end your adventure here or if you want to continue the rounds. If you accept to proceed, you will be rewarded with notable <strong>loot drops</strong>, including miracle weapons or legendary classic weapons on the roof where you assembled the PTL.</p>