Defeating the Gray Phantom in Hollow Knight: Silksong – A Guide to Braving the Misty Menace
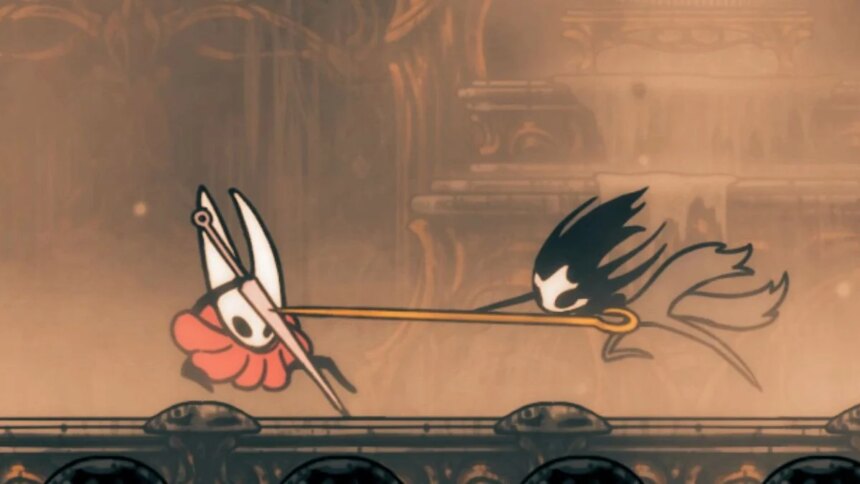
After navigating through the labyrinthine frustrations that make up the world of Hollow Knight: Silksong, our beloved Hornet stumbles upon a rather melodramatic foe – the Phantom from the Opera trying to channel its inner haywire ninja. This boss, located in the Wind Organ of Silksong, has the audacity to counterattacks like a seasoned pro. Below lies a perilous guide equipped with tips and tricks fit for slaying this spectral scoundrel and a lovely video of the encounter for visual learners (who are too lazy to read).
In the thrilling world of Hollow Knight: Silksong, combat has never been so intense or so delightfully chaotic. If fighting Lace felt like a gentle stroll in a sunflower field, then get ready for the upgraded boss battle that will have players questioning their life choices.
Where to Find the Phantom in Hollow Knight: Silksong?
Pursuing the elusive achievement attached to this optional boss? Fear not! A brief rundown of the marvelous route resembles a scavenger hunt, minus the fun.
- Begin by taking the elevator next to the Tavern of Duskvale. Once unlocked, a hidden doorway in the upper right corner ushers adventurers into the sparkly new region: The Fisherman’s Path.
- Traverse to the expansive vertical section on the right. Seek a ledge showcasing a corpse like a horrifically morbid beauty pageant contestant, which serves as the gateway to the infamous Bilesac zone.
- Meander through the vast, map-less expanse until you stumble upon the way station and bench tucked away in the bottom left corner. Don’t get too cozy just yet; this is before moving on to the next section.
- Finally, make your way into the Mist; the Phantom awaits at the top of some lofty vents, demanding a steam-powered showdown.
Preparing for the Phantom
If already trapped within the region, venturing out for extra bonuses might require someone with the endurance of a caffeinated squirrel.
- Tools such as Spike Traps and Steel Spikes become your dearest friends in this battle, especially when paired with the quest reward from the Pollips, allowing them to become poison-laced instruments of chaos.
- Silk generation bonuses are also immensely helpful, enabling more healing shenanigans or spell-slinging antics.
The Phantom Fight
Positioning is key; start on the right side of the room. The center and left might as well be a sauna of vengeful steam, waiting to smack the unprepared.
- As a boss, the Phantom boasts a speed that could leave even a caffeinated squirrel in the dust. It will actively react to movements like a drama queen; blocking attacks with its needle and launching brutal counterattacks if anyone dares to touch it while it’s guarding. Height is your new best friend, so jump, and stay airborne if humanly possible!
The Phantom gets an aerial block and ground block – a right overachiever there. It appears crucial moments when to hit:
- Immediately after one of its attacks.
- Upon its landing post aerial maneuver or needle toss.
- After successful dodging from its menacing vertical mega attack.
Each time, there’s a brief opportunity to strike right before the blocking dance begins. Stay nimble and quick; delay only invites the impending doom of counteractions.
- Finding the battle rhythm is key. The glorious tactic that worked wonders involved hanging out on the room’s edges until the Phantom threw its needle, then gracefully backflipping behind it as it completes its flurry of attacks. Staying that far from the center gives fewer window opportunities for the boss to strike back.
- Want to heal? Wait for the Phantom’s needle throw, jump then heal mid-air – a splendid timing mechanism that even includes a side of paranoia since the boss is usually trying to kill you.
Phase 2: The Plot Thickens
- Once enough damage has been inflicted, the Phantom enters phase two, unlocking a dreadful aerial dive attack that will leave stomping mortals sprawled in dread. Always be ready to sprint like a frightened rabbit to evade the blast radius. After that, turn around for an epic sneak attack once it lands! Aim to dominate the middle of the chamber to avoid the walls; after all, a claustrophobic escape isn’t recommended during this chaos.
- During this phase, only squeeze in a healing break right after the Phantom punctuates the air with its dive, leap out of the blast zone, jump, and mend those wounds!
Phase 3: Pandemonium Unleashed
- Welcome to a world of absolute havoc; this is where the Phantom becomes a whirlwind of destruction. It can chain together four consecutive aerial strikes like a wannabe gymnast, while also magically vanishing into the mist to dodge incoming blows. Your arsenal now comes to life – set traps like it’s a party planner in chaos. Lay down Spike and Steel Spikes against the walls; they don’t ask for guidance and will ensure the Phantom meets quite an explosive fate without any tedious aiming required.
- If lacking traps, brace for a long and arduous fight filled with hair-ripping stress. Maintain an impeccable position to sidestep needles and aerial assaults.
Rewards for the Brave
In a rare act of compassion from game developers, those who conquer this wretched foe are generously rewarded, likely in recognition of the suffering endured just to reach this confrontation. The Crosspoint ability, otherwise known as the Phantom’s block and counterattack, will be bestowed unto players, producing new, preposterous ways to obliterate foes. As if that weren’t enough, access to the coveted Citadel opens up from a not-so-secret backdoor! For those not inclined to toll all the bells or defeat the Final Judge, this is a delicious treat. The upcoming discovery of whether speed runners will favor this route looms large!