Lace déchue Hollow Knight Silksong: How to Defeat Lost Lace, the Final Boss
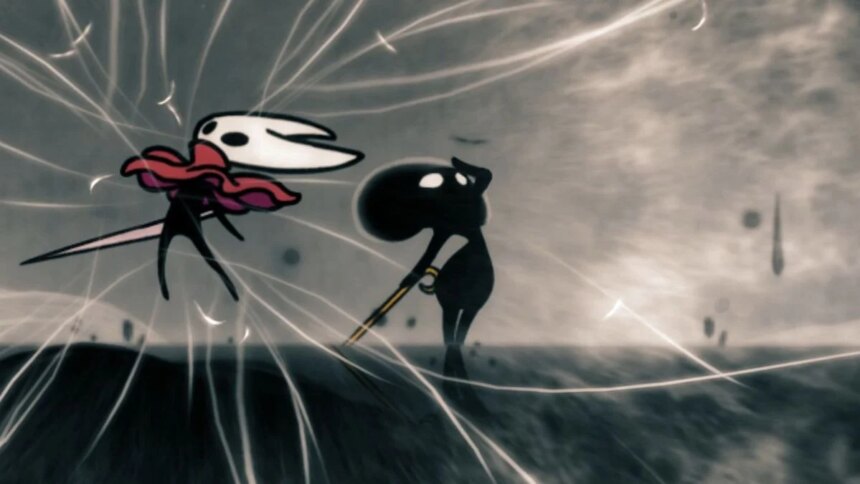
Ah, the sweet nectar of victory awaits, but first, one must face the infamous Lost Lace in the ultimate showdown of Hollow Knight Silksong. Brace for impact, because this boss is as challenging as trying to explain a meme to your dad—frustrating and slightly amusing. Ready for an exasperating ride? Here’s a video of the glorious battle alongside a written guide filled with tips and tricks that might just help score the elusive victory and push those credits to roll.
After countless hours, a veritable marathon of suffering, a single obstacle stands between the player and that sweet, sweet conclusion. Despite previous victories over Lace—twice, might one add—this fight feels like being trapped in a parallel universe where nothing makes sense. It’s as if the game designers met for a coffee break and decided, “Let’s make this boss fight the stuff of nightmares.”
Preparations: Gear Up Before Facing Lost Lace
Seeking 100% completion? Of course, it’s not just about bragging rights; it’s about those sweet power bonuses and shiny trophies. Prepare to gather every pale oil, fuse it with Eva (not the Disney princess), and collect all the mask fragments, coils, and tools. A toolkit for tackling Lost Lace might look something like this:
Spell – Sharp Dart: Perfect for exiting sticky situations while dealing damage. Who could ask for more?
Yellow Gear
- Silkspindle Bracelets (Speed boost, because who doesn’t love a good sprint?)
- Magnetite Deflector (Low chance of deflecting damage, thus making every hit more bearable)
- Heavy Ring (Reduces knockback, because fall damage is overrated)
Blue Gear
- Long Claw(Increases attack range; because distance makes the heart grow fonder—or just keeps it from exploding)
- Sawtooth Belt (Adds a circular attack with a double jump; how fancy!)
- Druidic Eyes (Gives 2 units of silk upon taking damage; ironic, isn’t it?)
Red Gear
- Buzzfly (Targeted damage—like a heat-seeking missile for your enemies)
- Plasmonium Vial (Survival is key) or Steel Spikes (Damage, because sometimes brutal force is the answer)
Opting for the Reaper Emblem is a classic choice, delivering a rock-solid vertical attack alongside post-heal silk generation. However, choose what feels right because indecision can be fatal. The final boss doesn’t wait for clarity.
Before launching into the abyss, stockpile some shells. Transform all those useless pearls into shell packs from a merchant. Aim for 20 in reserve to avoid panic attacks between boss encounters.
Essential Tips and Hints for the Battle
Think of the first phase as the tutorial for the battle. Lace’s basic movements and attacks are as consistent as a cat lunging at a laser pointer. Master this phase to sail through subsequent challenges; the extra attacks are just cherry toppings on the already overhyped sundae. Here are some handy general rules to start:
- Play it cool; patience is a virtue: Lace’s counterattacks and devastating combo antics spell disaster if charged at aggressively. Trust that cautious opportunities yield the greatest rewards. Each of Lace’s movements has multiple follow-ups that can leave you staring at the ‘Game Over’ screen in despair. It’s better to operate under the principle of “Always expect the worst combo possible.”
- No panicking, no running: It’s easier said than done, but lace punishes mistakes like a stern teacher. Running can land one smack dab in her teleport range, leading to damage before one even meets the weapon. Timing is everything—make the right moves during her attacks, and one might just avoid being squished.
- Save your tools for Phase 3: Unless packing an endless stash of shells, refrain from slinging all tools at the boss. The third phase is the real kicker, where damage opportunities become rare. Drones and offensive tools are your golden geese here. Don’t squander them during earlier phases unless wishing to faceplant into defeat.
- Avoid the edges of the arena: Lace can be quite good at cornering victims. Take care not to hang around the edges; it’s certain to lead to unpleasant surprises during Phase 3.
- Use aerial attacks to gain height: Healing in the air allows a breather during the first phase, maximizing survival.
Phase 1: The Warm-up
- Charge: This is basically Lace’s go-to move. She loves lunging forward, leaving a trail of tentacles in her wake. The strategy? Maybe get a sneak aerial attack in during her second charge if feeling adventurous. But, be warned—she’s likely to counter with some sharp needle jab or an aerial attack of her own! Retreat for position can pay off; a landing hit on her may just happen.
- Block: Lace has impeccable timing, often blocking right after attacking. Beat that clock and launch an attack. This creates an excellent opportunity—if the attack gets blocked, perform a double jump to shift from defense to offense rather comfortably. However, she might retaliate with ground or aerial assaults, so consider jumping to evade.
- Sword Combo: A classic move, a quick chance to strike if within range. Be wary of counters, as with all things.
- Tentacle Strike: This quick move has a shocking range! Tentacles reach like an overzealous hug from grandma; one rarely has time to escape. But, it opens opportunities for those savvy enough to strike after.
- Jump: Lace has a peculiar fondness for jumping. Collision with her hitbox is like an instant trip to oblivion. Avoid leaping over her unless she’s set in motion—wait and react to her moves.
- Teleportation: This is what makes the battle such a cakewalk—if the cake were buried under tons of lead. Lace can pop up anywhere, making her unpredictable. As a general rule, keep moving during her consecutive attacks and remain grounded when she teleports.
Phase 2: Time to Get Serious
Upon Lace’s dramatic scream, she’ll transition into Phase 2—definitely the point to unleash the furious strikes. It is important to learn that she retains the Phase 1 antics—this time with an extra sprinkle of ominous void powers:
- Blade Orbs: Brace for impact as she launches several orbs that will detonate into a storm of blades post landing. If near, land a few solid hits, but dodging is key!
- Aerial Projectiles: Now three black holes appear, firing projectiles directly at you. For those who enjoy taking to the skies, this could spell disaster. It’s safer to remain grounded; move once she initiates her attacks.
- Tentacle Eruption: Adding layers to the difficulty pie, tentacles will rear up as a response to many of her moves. No area is safe—abandon all hope of comfort during this phase.
Phase 3: The Grand Finale
After Lace howls again, she vanishes, granting a brief moment to regroup. Then, two massive waves of darkness will sweep across the arena. Initiate a daring double jump followed by a dash to escape. A second wave will always follow in the opposite direction. Maneuvering skillfully will be the order of the day!
- Double Darkness Waves: The principle is as before—if you spot a wave at ground level, make a swift exit to the opposite side. Use the wall for a higher jump to avoid both waves.
Attention! The waves obliterate all static traps. Traps like Spikes should only be deployed at opportune moments—or not at all if looking for a rough ride.
- Ultimate Area Attack: Much like her second bout, staying clear of the marked zones is crucial unless one has a death wish. Avoid rushing in; instead, try aerial attacks strategically.
The Sweet Aftermath
Defeating Lace is not just a boastful achievement; it unlocks several trophies and a brightly shining page in the Hunter’s Journal—because who doesn’t want a record of such turmoil? Sadly, tangible rewards may be scarce, but the glory will surely echo. Rejoice in victory!


